2.0 Configure new router using open ziti
2.1 Create a VM on Digital Ocean
Please follow Section 1.1 of the Controller Guide to setup a VM to be used as Router.
2.2 Login and Update the repo and apps on VM
Once the VM is created, we can get the IP address of the droplet from the Resources screen. Login to the VM by using user "root" and IP address:
ssh root@<ip>
2.2.1 apt update
sudo apt update
sudo apt upgrade
2.2.2 Download ziti_router_auto_enroll binary
ziti_router_auto_enroll is an easy way to setup your router automatically.
wget https://github.com/netfoundry/ziti_router_auto_enroll/releases/latest/download/ziti_router_auto_enroll.tar.gz
tar xf ziti_router_auto_enroll.tar.gz
You should have a file ziti_router_auto_enroll under the directory.
For detail info on ziti_router_auto_enroll, please checkout the github page
2.3 Create and setup Router directly on router VM
You can setup the router directly on the router VM with one command if you did not block your controller's edge-management port. At this time, the quickstart for setting up controller does not separate edge-management port from edge-client port, so the edge-management port has to be open. You may continue this section if you know your controller's management password, Fabric Port (default 8440) and Management Port (default 8441).
You can also choose to create router on the controller and then register with the jwt file (created when creating the router) on the router. The procedure for this is detailed in section 2.4
2.3.1 Info needed for creating Router
In order to create the Router, the VM needs to contact controller. We need the following information before we can continue:
- Controller IP
- Controller Fabric Port: On the controller, issue this command echo $ZITI_CTRL_PORT
- Controller Management Port: On the controller, issue this command echo $ZITI_EDGE_CONTROLLER_PORT
- Controller Passwd: On the controller, issue this command echo $ZITI_PWD
- Router Name: Name for this router
2.3.2 Info gathered for creating Router
Here is information I gathered from previous step:
- Controller IP: 161.35.108.218
- Controller Fabric Port: 8440 (default value if following controller setup guide)
- Controller Management Port: 8441 (default value if following controller setup guide)
- Controller Passwd: Test@123
- Router Name: JAMES-ER-SF
We are also going to create the router without healthcheck section and metrics, so the following two options will be used to create the router:
- --disableHealthChecks
- --disableMetrics
If you choose to explore these two functionalities, you can remove the options (from command line) when creating router.
2.3.3 Create the Router with link listener
./ziti_router_auto_enroll -f -n --controller 161.35.108.218 --controllerFabricPort 8440 --controllerMgmtPort 8441 --adminUser admin --adminPassword Test@123 --assumePublic --disableHealthChecks --disableMetrics --routerName JAMES-ER-SF
output
2023-04-05-04:07:44-INFO-Writing jwt file: JAMES-ER-SF_enrollment.jwt
2023-04-05-04:07:44-INFO-Version not specified, going to check with controller
2023-04-05-04:07:45-INFO-Found version 0.27.7
2023-04-05-04:07:45-INFO-Downloading file: https://github.com/openziti/ziti/releases/download/v0.27.7/ziti-linux-amd64-0.27.7.tar.gz
Downloading: 100%|████████████████████████████████████████████████████████████████████████████████████████████| 115M/115M [00:01<00:00, 67.3MiB/s]
2023-04-05-04:07:47-INFO-Successfully downloaded file
2023-04-05-04:07:47-INFO-Starting binary install
2023-04-05-04:07:50-INFO-Installing service unit file
2023-04-05-04:07:50-INFO-Creating config file
2023-04-05-04:07:50-INFO-Starting Router Enrollment
2023-04-05-04:07:54-INFO-Successfully enrolled Ziti
2023-04-05-04:07:54-INFO-Service ziti-router.service start successful.
Created symlink /etc/systemd/system/multi-user.target.wants/ziti-router.service → /etc/systemd/system/ziti-router.service.
2023-04-05-04:07:55-INFO-Service ziti-router.service enable successful.
Alternative way of creating router
Instead of passing parameters through the command line to create routers, the parameters can be specified via environmental variables. Here is example on how to accomplish that.
export CONTROLLER="161.35.108.218"
export CONTROLLERFABRICPORT="8440"
export CONTROLLERMGMTPORT="8441"
export ADMINUSER="admin"
export ADMINPASSWORD="Test@123"

./ziti_router_auto_enroll -f -n --assumePublic --disableHealthChecks --disableMetrics --routerName JAMES-ER-SF
2.3.4 Create the Router with link listener and tunneler
./ziti_router_auto_enroll -f -n --controller 161.35.108.218 --controllerFabricPort 8440 --controllerMgmtPort 8441 --adminUser admin --adminPassword Test@123 --assumePublic --disableHealthChecks --disableMetrics --autoTunnelListener --routerName JAMES-ER-SF
2.3.5 Create the Router with edge listener only (no link listener)
./ziti_router_auto_enroll -f -n --controller 161.35.108.218 --controllerFabricPort 8440 --controllerMgmtPort 8441 --adminUser admin --adminPassword Test@123 --disableHealthChecks --disableMetrics --routerName JAMES-ER-SF
2.3.6 Create the Router with edge listener and tunneler
./ziti_router_auto_enroll -f -n --controller 161.35.108.218 --controllerFabricPort 8440 --controllerMgmtPort 8441 --adminUser admin --adminPassword Test@123 --disableHealthChecks --disableMetrics --autoTunnelListener --routerName JAMES-ER-SF
2.4 Creating Router on Controller first
If you already go through the procedure in section 2.3, you can skip to section 2.5
You can create the router on the controller first then register the router on the router VM.
2.4.1 Creating Router on the controller Using ZAC
If you prefer to create router using CLI, you can jump to next section.
In order to complete the procedures in this section, you need to install ZAC first and have access to the controller using the ZAC. If you have trouble using ZAC, you can use the CLI procedures to create router.
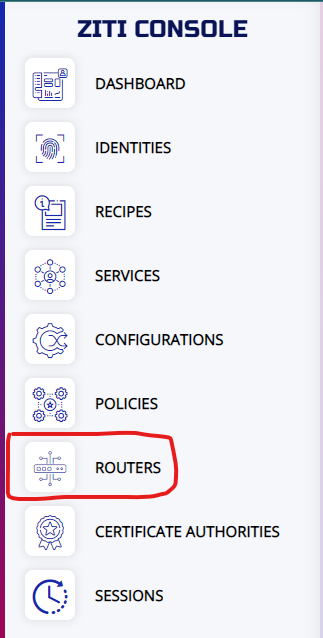
From the ZAC welcome screen, choose the ROUTERS
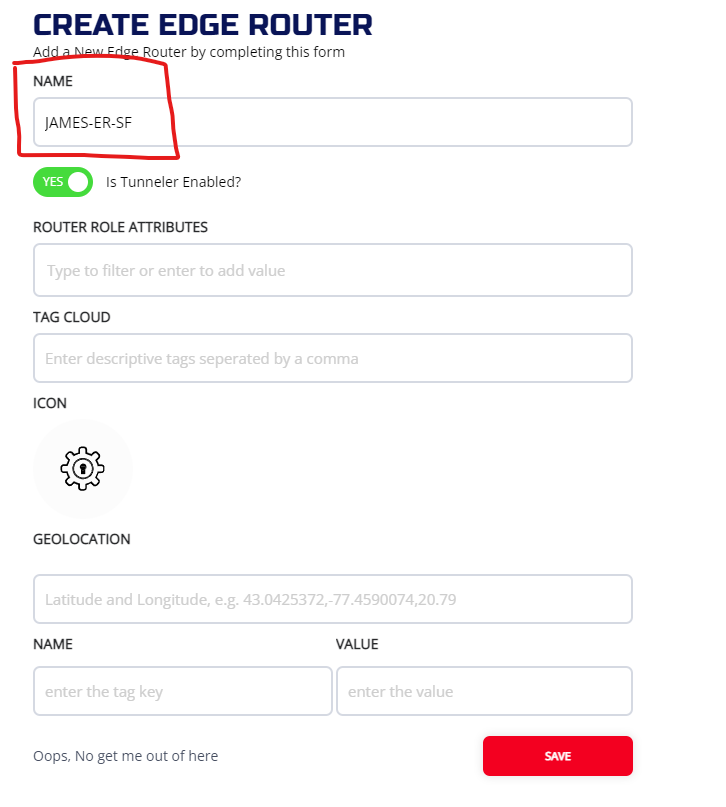
Click on + to bring up the CREATE EDGE ROUTER widget. The NAME of Router is required, and it has to be unique. Also choose whether you want the tunneler to be enable or not on the router. Enter other optional fields and hit SAVE
If the router is created successfully, you will be back to the MANAGE EDGE ROUTERS screen. From the list of edge routers, you will see the JWT icon on the newly created router. You need this JWT for the registration.
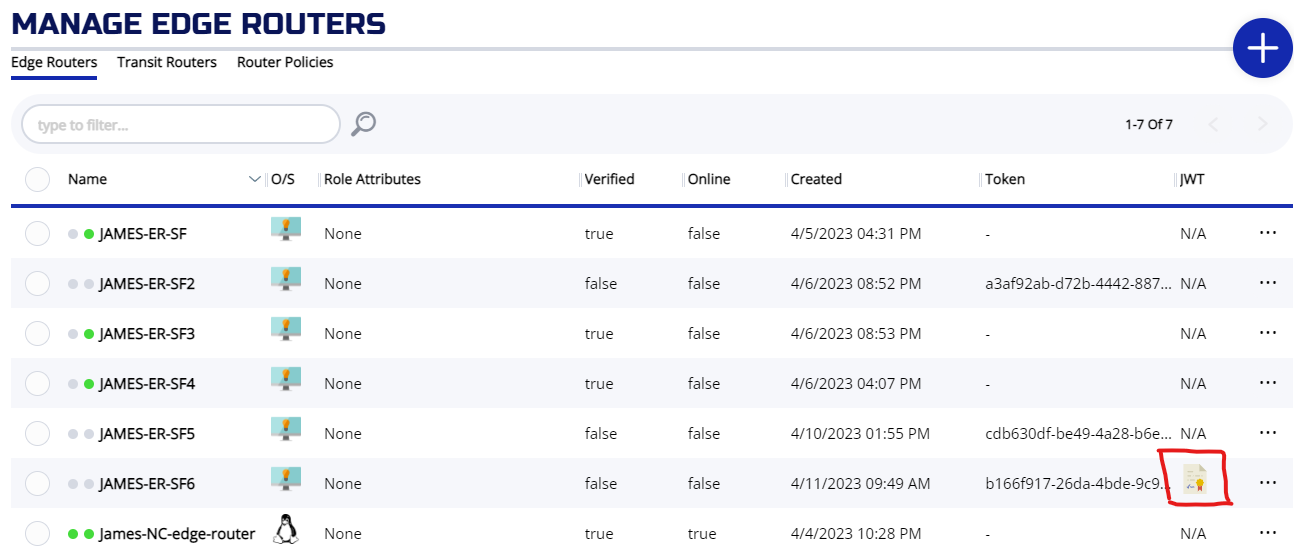
Click on the JWT ICON, the JWT will be downloaded to your machine. On Chrome browser, the downloaded file will appear on the bottom right corner of the browser like picture below.

Open the JWT file, and copy the content. Now you are ready for the registration.

2.4.2 Creating Router on the controller Using CLI
If you already created router using ZAC, you can skip ahead to register the router. Otherwise, this section provides CLI commands to create routers on the controller.
login to controller login to CLI first
zitiLogin
To create an edge router (no tunneler)
ziti edge create edge-router JAMES-ER-SF -o JAMES-ER-SF.jwt
output
New edge router JAMES-ER-SF2 created with id: BzUtjC7E.
Enrollment expires at 2023-04-07T03:52:03.997Z
To create an edge router with tunneler
ziti edge create edge-router JAMES-ER-SF -t -o JAMES-ER-SF.jwt
Cat out the content of the jwt file. We will need to use the jwt to register router
# cat  JAMES-ER-SF.jwt
eyJhbGciOiJSUzI1NiIsInR5cCI6IkpXVCJ9.eyJlbSI6ImVyb3R0IiwiZXhwIjoxNjgwODM5NjA4LCJpc3MiOiJodHRwczovLzE2MS4zNS4xMDguMjE4Ojg0NDEiLCJqdGkiOiJhNDg5N2Q0ZS1lZTY4LTQ1M2UtYjY1NS03MGU0YjgyZTllNDciLCJzdWIiOiJpY2JLakM3RS5QIn0.Y6DohYyWEeJQmRMe29v4cL3Y1APCnBlrv_-S_941au2OESuQdt2CS4C4djvESYzV5vbnbgZgyU5xtNvb4lW5Uv2HP3XUGQNVsWjpwZbazNoTXg1IX6hhWb7T6u1AhS4xnJ3jpoapKsdOkUSqeQNUMSiN3aeLNcGVA_XK1-utCYjVsHDC90M1ZYZqgd8C9IKziDI10XQVlKTqosv8hoJD0OKIu7WZMslweRSMBtQUA2lZ2QSkIhFr2bvtgPll-5aBnG7eo6Ka_WtEW6EikU2fxgpNaVVBEIdZs1tkdGU6dfBDA6j5wA1TBI0FZnuKlNW24bMZCWKy2B_AMqJW1a80I0qNDx-QHEy-pt8FzZ-eqXWyfhc_nYzwT9kr6hO9VJrrD81hboCeTl8G6EXZjwCi2lPbKHROtkQu08-Ns1Kps7R3GILeNMltW9tKApP746ek4DVxm2cKqiB1Axcb0tNjDWTthjyp8m40aSiiqOPIoQbwa43JLqbHcuhZOSBLQNb_bwzkxBSf34D2w5eVETWy9VX-lgHwM-uhT5SfZIWdnWtO7-Cxn-cqgz89twtOim-yc5j0p0ieAbrOArbjKFBXiQjP8yWkorQKlj5PTSk7vyb3X4q6p--RxP2Z5F8alCPQx3XiVcohvIJnrJiEP86myNIYcKhhJ4OB4r9iOr0qTc8
We also need the management port (default 8441) and fabric port (default 8440) of the controller to register the router
# echo $ZITI_EDGE_CONTROLLER_PORT
8441
# echo $ZITI_CTRL_PORT
8440
2.4.3 Register the Router with link listener
Perform this on the Router VM
command
./ziti_router_auto_enroll -f -n --controllerFabricPort 8440 --controllerMgmtPort 8441 --assumePublic --disableHealthChecks --disableMetrics <jwt content>
./ziti_router_auto_enroll -f -n --controllerFabricPort 8440 --controllerMgmtPort 8441 --assumePublic --disableHealthChecks --disableMetrics eyJhbGciOiJSUzI1NiIsInR5cCI6IkpXVCJ9.eyJlbSI6ImVyb3R0IiwiZXhwIjoxNjgwODM5NjA4LCJpc3MiOiJodHRwczovLzE2MS4zNS4xMDguMjE4Ojg0NDEiLCJqdGkiOiJhNDg5N2Q0ZS1lZTY4LTQ1M2UtYjY1NS03MGU0YjgyZTllNDciLCJzdWIiOiJpY2JLakM3RS5QIn0.Y6DohYyWEeJQmRMe29v4cL3Y1APCnBlrv_-S_941au2OESuQdt2CS4C4djvESYzV5vbnbgZgyU5xtNvb4lW5Uv2HP3XUGQNVsWjpwZbazNoTXg1IX6hhWb7T6u1AhS4xnJ3jpoapKsdOkUSqeQNUMSiN3aeLNcGVA_XK1-utCYjVsHDC90M1ZYZqgd8C9IKziDI10XQVlKTqosv8hoJD0OKIu7WZMslweRSMBtQUA2lZ2QSkIhFr2bvtgPll-5aBnG7eo6Ka_WtEW6EikU2fxgpNaVVBEIdZs1tkdGU6dfBDA6j5wA1TBI0FZnuKlNW24bMZCWKy2B_AMqJW1a80I0qNDx-QHEy-pt8FzZ-eqXWyfhc_nYzwT9kr6hO9VJrrD81hboCeTl8G6EXZjwCi2lPbKHROtkQu08-Ns1Kps7R3GILeNMltW9tKApP746ek4DVxm2cKqiB1Axcb0tNjDWTthjyp8m40aSiiqOPIoQbwa43JLqbHcuhZOSBLQNb_bwzkxBSf34D2w5eVETWy9VX-lgHwM-uhT5SfZIWdnWtO7-Cxn-cqgz89twtOim-yc5j0p0ieAbrOArbjKFBXiQjP8yWkorQKlj5PTSk7vyb3X4q6p--RxP2Z5F8alCPQx3XiVcohvIJnrJiEP86myNIYcKhhJ4OB4r9iOr0qTc8
output
2023-04-07-01:07:49-INFO-Version not specified, going to check with controller
2023-04-07-01:07:49-INFO-Found version 0.27.7
2023-04-07-01:07:49-INFO-Downloading file: https://github.com/openziti/ziti/releases/download/v0.27.7/ziti-linux-amd64-0.27.7.tar.gz
Downloading: 100%|██████████████████████████████████████████████████████████████████████████████████████████████████████████████████████████████████████████████████████████████████████| 115M/115M [00:01<00:00, 68.9MiB/s]
2023-04-07-01:07:51-INFO-Successfully downloaded file
2023-04-07-01:07:51-INFO-Starting binary install
2023-04-07-01:07:54-INFO-Installing service unit file
2023-04-07-01:07:55-INFO-Service ziti-router daemon-reload successful.
2023-04-07-01:07:55-INFO-Creating config file
2023-04-07-01:07:55-INFO-Starting Router Enrollment
2023-04-07-01:07:57-INFO-Successfully enrolled Ziti
2023-04-07-01:07:57-INFO-Service ziti-router.service start successful.
2023-04-07-01:07:57-INFO-Service ziti-router.service enable successful.
2.4.4 Register the Router with link listener and tunneler
./ziti_router_auto_enroll -f -n --controllerFabricPort 8440 --controllerMgmtPort 8441 --assumePublic --disableHealthChecks --disableMetrics --autoTunnelListener <jwt content>
2.4.5 Register the Router with edge listener only (no link listener)
./ziti_router_auto_enroll -f -n --controllerFabricPort 8440 --controllerMgmtPort 8441 --disableHealthChecks --disableMetrics <jwt content>
2.4.6 Register the Router with edge listener and tunneler
./ziti_router_auto_enroll -f -n --controllerFabricPort 8440 --controllerMgmtPort 8441 --disableHealthChecks --disableMetrics --autoTunnelListener <jwt content>
2.5 Auto start the router
After enroll the router, a systemd service file is automatically created and enabled. To check the status of the service file, issue the following command:
systemctl status ziti-router
Output
● ziti-router.service - Ziti-Router
     Loaded: loaded (/etc/systemd/system/ziti-router.service; enabled; vendor preset: enabled)
     Active: active (running) since Wed 2023-04-05 14:45:59 UTC; 4s ago
   Main PID: 18381 (ziti)
      Tasks: 6 (limit: 2323)
     Memory: 16.5M
        CPU: 222ms
     CGroup: /system.slice/ziti-router.service
             └─18381 /opt/ziti/ziti router run /opt/ziti/config.yaml
If the status shows active (running), then the setup finished correctly.
On the controller, you can check the status of the routers. Please refer to the controller guide (useful command for the Router) section for more information.
2.6 Fix the resolver
If you run router without tunneler enabled, you can skip this section.
We need to remove the digital ocean resolver for tunnel resolver to work correctly.
Check resolver before any changes:
# resolvectl
Global
         Protocols: -LLMNR -mDNS -DNSOverTLS DNSSEC=no/unsupported
  resolv.conf mode: stub
Current DNS Server: 67.207.67.2
       DNS Servers: 67.207.67.2 67.207.67.3
...
...
Under the Global DNS servers, it should say something like "67.207.67.2 67.207.67.3"
Now, make changes to the resolver:
cd /etc/systemd/resolved.conf.d/
rm DigitalOcean.conf
sudo ln -s /dev/null DigitalOcean.conf
systemctl restart systemd-resolved.service
Check resolver again
# resolvectl
Global
         Protocols: -LLMNR -mDNS -DNSOverTLS DNSSEC=no/unsupported
  resolv.conf mode: stub
Current DNS Server: 146.190.120.86
       DNS Servers: 146.190.120.86
...
...
Now the Global DNS servers should be the IP address on your local interface.